How to Setup a Shared Inbox in Gmail (All Methods)
We go over how to setup a shared inbox in Gmail, including everything from shared logins to advanced software solutions.

You’ve probably seen the signs. Duplicate replies. Missed customer messages. A flood of emails with no clear sense of who’s handling what. It’s the familiar chaos of a growing team still trying to manage customer communication from a single email account.
That’s where shared inbox software comes in. A shared inbox gives your team one central hub to manage group emails like support@ or info@ without stepping on each other’s toes. It brings structure, visibility, and collaboration to what used to be a messy free-for-all.
While you can set up a shared mailbox in Gmail or Outlook, these basic tools miss the mark when it comes to features like internal notes, assignment tracking, and integrations. That’s why many B2B teams move to dedicated shared inbox platforms.
The right tool does more than centralize your email communications. It helps you work faster and smarter while keeping everyone on the same page.
In this guide, we’ll review the best shared inbox software tools and break down features, drawbacks, and pricing. You’ll also find a comparison table, tips for choosing the right solution, and advice for implementing a shared inbox that actually works.
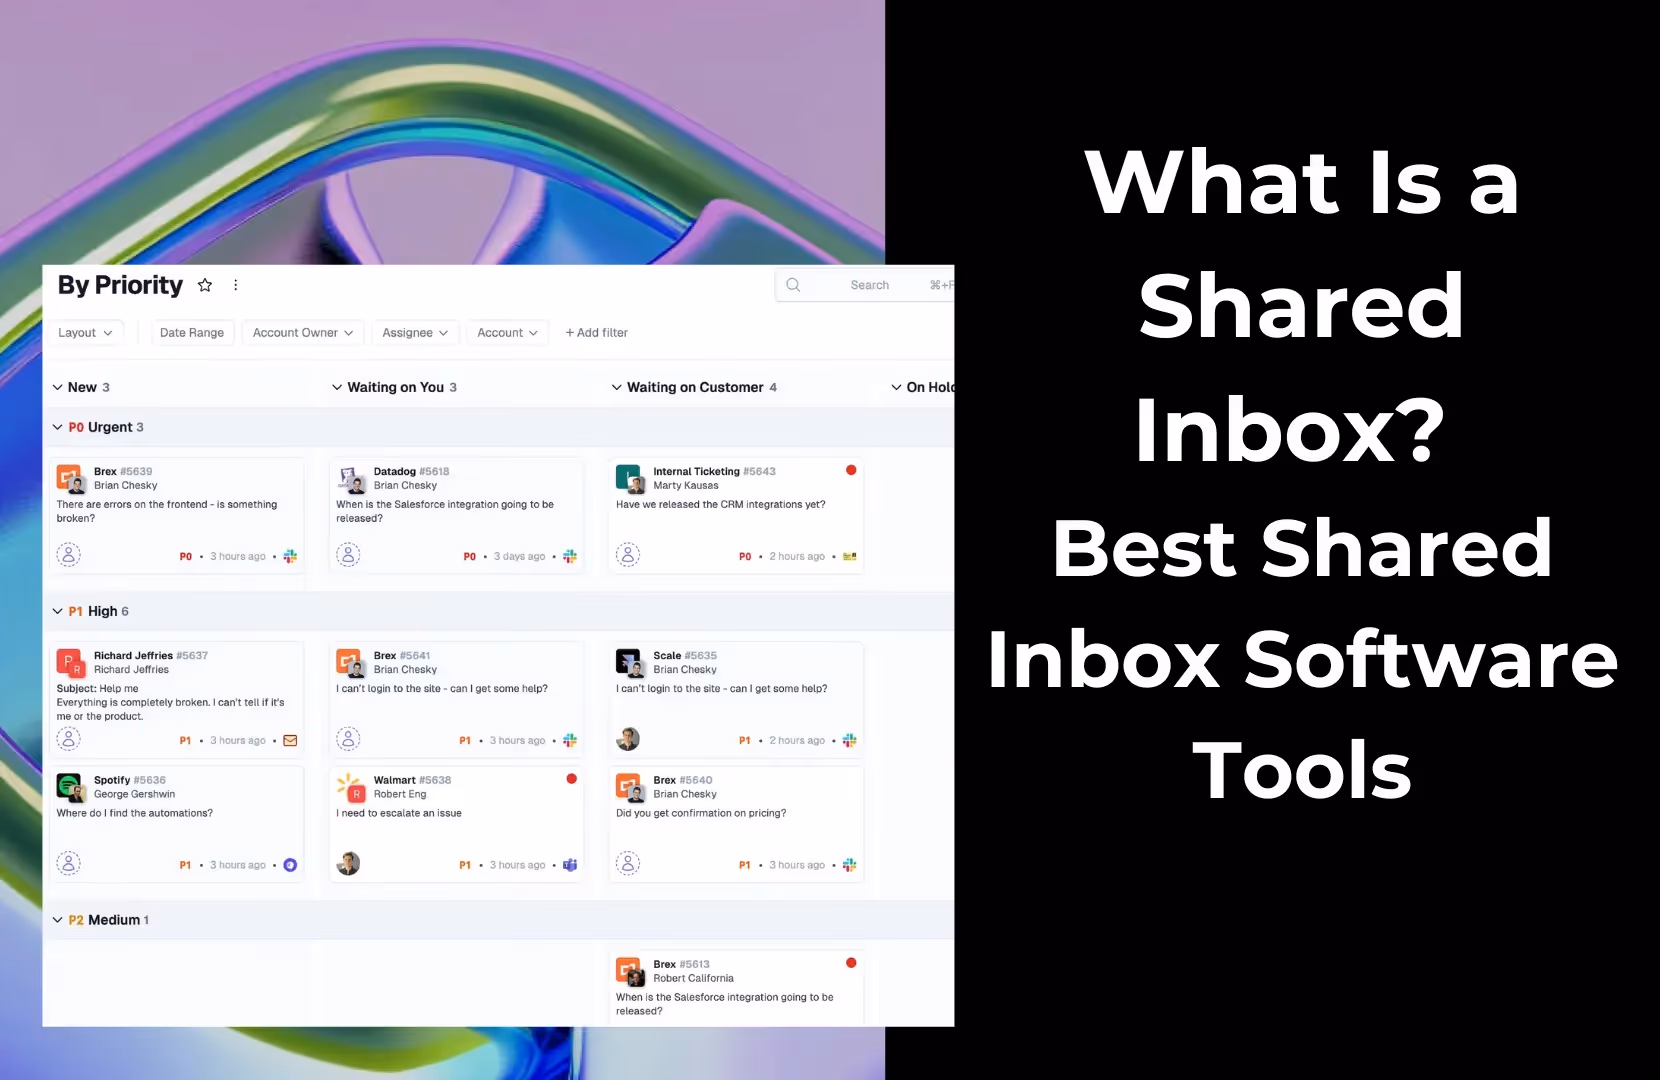
What Is a Shared Inbox?
A shared inbox is a single email address managed by multiple people. Think support@yourcompany.com or billing@yourcompany.com. These are team-facing addresses meant to handle incoming requests from customers, vendors, or prospects.
Instead of forwarding messages or passing logins around, a shared inbox gives your team a secure, centralized place to receive, assign, and reply to emails. Everyone sees the same view. Nothing falls through the cracks, and you avoid awkward duplicate replies.
Shared inbox software takes that concept further. It adds collaboration features like internal comments, assignment tracking, collision detection (so two people don’t reply at once), and deep integrations with the tools your team already uses.
Pylon, for example, turns your shared inbox into a unified hub for all support communication, including email, Slack, Microsoft Teams, live chat, and more. So, whether a customer sends a message through your website or is requesting support over Slack, it shows up in one place with full context.
This approach helps your team work together in real time, stay organized, and get the full picture of what’s happening with any customer conversation. No more tab-switching or information silos. Just focused, responsive support.
What benefits might you find with shared inbox software? They’ll vary depending on factors like your industry, the size of your team, and the complexity of your communication and collaboration needs.
However, some of the most common benefits businesses experience include better accountability, improved collaboration, enhanced communication accuracy, better organization, increased productivity, fewer duplications, and more personalized interactions.
Best Shared Inbox Software Tools
Shared inbox software has evolved into a pretty diverse category, with tools ranging from lightweight Gmail add-ons to full-fledged helpdesk platforms.
However, they’re not the same. Each one brings a different balance of collaboration, automation, and analytics. Some are better suited for SMBs, while others are designed with enterprise-level needs in mind.
Here are the best shared inbox tools for B2B teams.
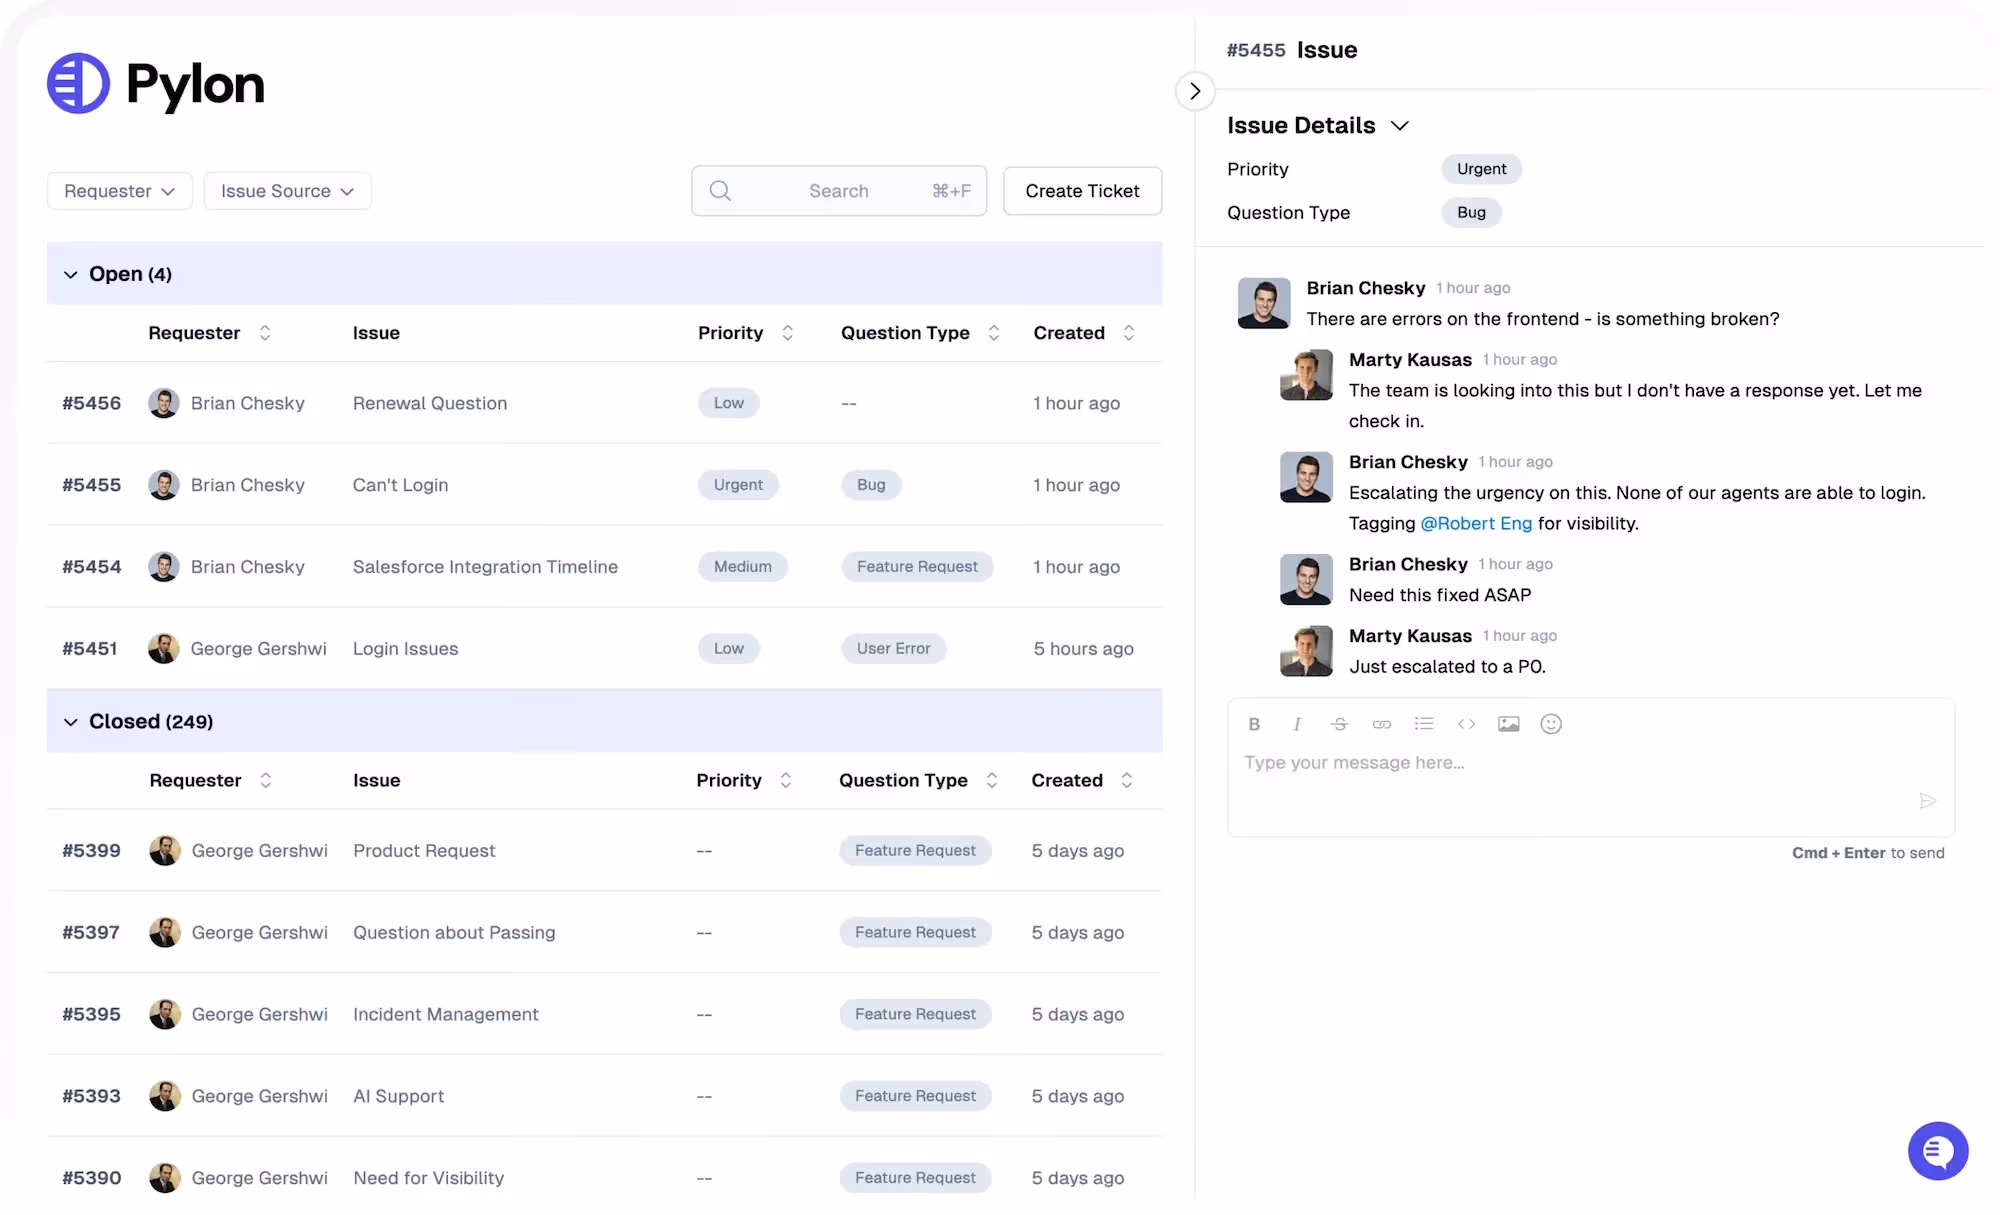
Pylon

Best for: B2B support and operations teams that need a unified inbox with powerful collaboration and workflow automation. Ideal for those seeking an AI-augmented but user-friendly shared email solution.
Pylon is purpose-built for B2B teams that manage customer relationships across multiple channels. More than just a shared email inbox, Pylon brings together email, Slack, Microsoft Teams, live chat, and more into a single interface.
You can assign messages, @mention teammates, and use internal comments, all without leaving the thread. And with intelligent automation, Pylon routes messages based on tags, account status, or urgency, so the right person sees it first.
Pylon was also designed with collaboration in mind, not just ease of communication. Whether you’re resolving a support ticket, routing a sales request, or checking in with a customer success manager, Pylon keeps everyone aligned.
Key features:
- Omnichannel support. Pylon combines Gmail, Slack, Teams, live chat, and more into one inbox so you never miss a message, no matter where it comes from.
- Collaboration & internal comments. Tag teammates, leave notes, and assign messages all in-thread so everyone stays on the same page.
- Automated email routing & workflows. Route emails based on deal stage, keyword, or urgency. Trigger workflows that notify the right people automatically.
- AI Agents for autonomous support. Deploy intelligent agents that can automatically respond to common queries, escalate complex issues, and handle ticket pre-work while learning from your team's responses.
- Tagging and organization. Use tags to track issue types, product areas, or customers. Create saved views for better inbox clarity.
- Integrations & workflow extensions. Sync with Pipedrive, HubSpot, Salesforce, and more. Connect your CRM, calendar, and task tools without breaking a sweat.
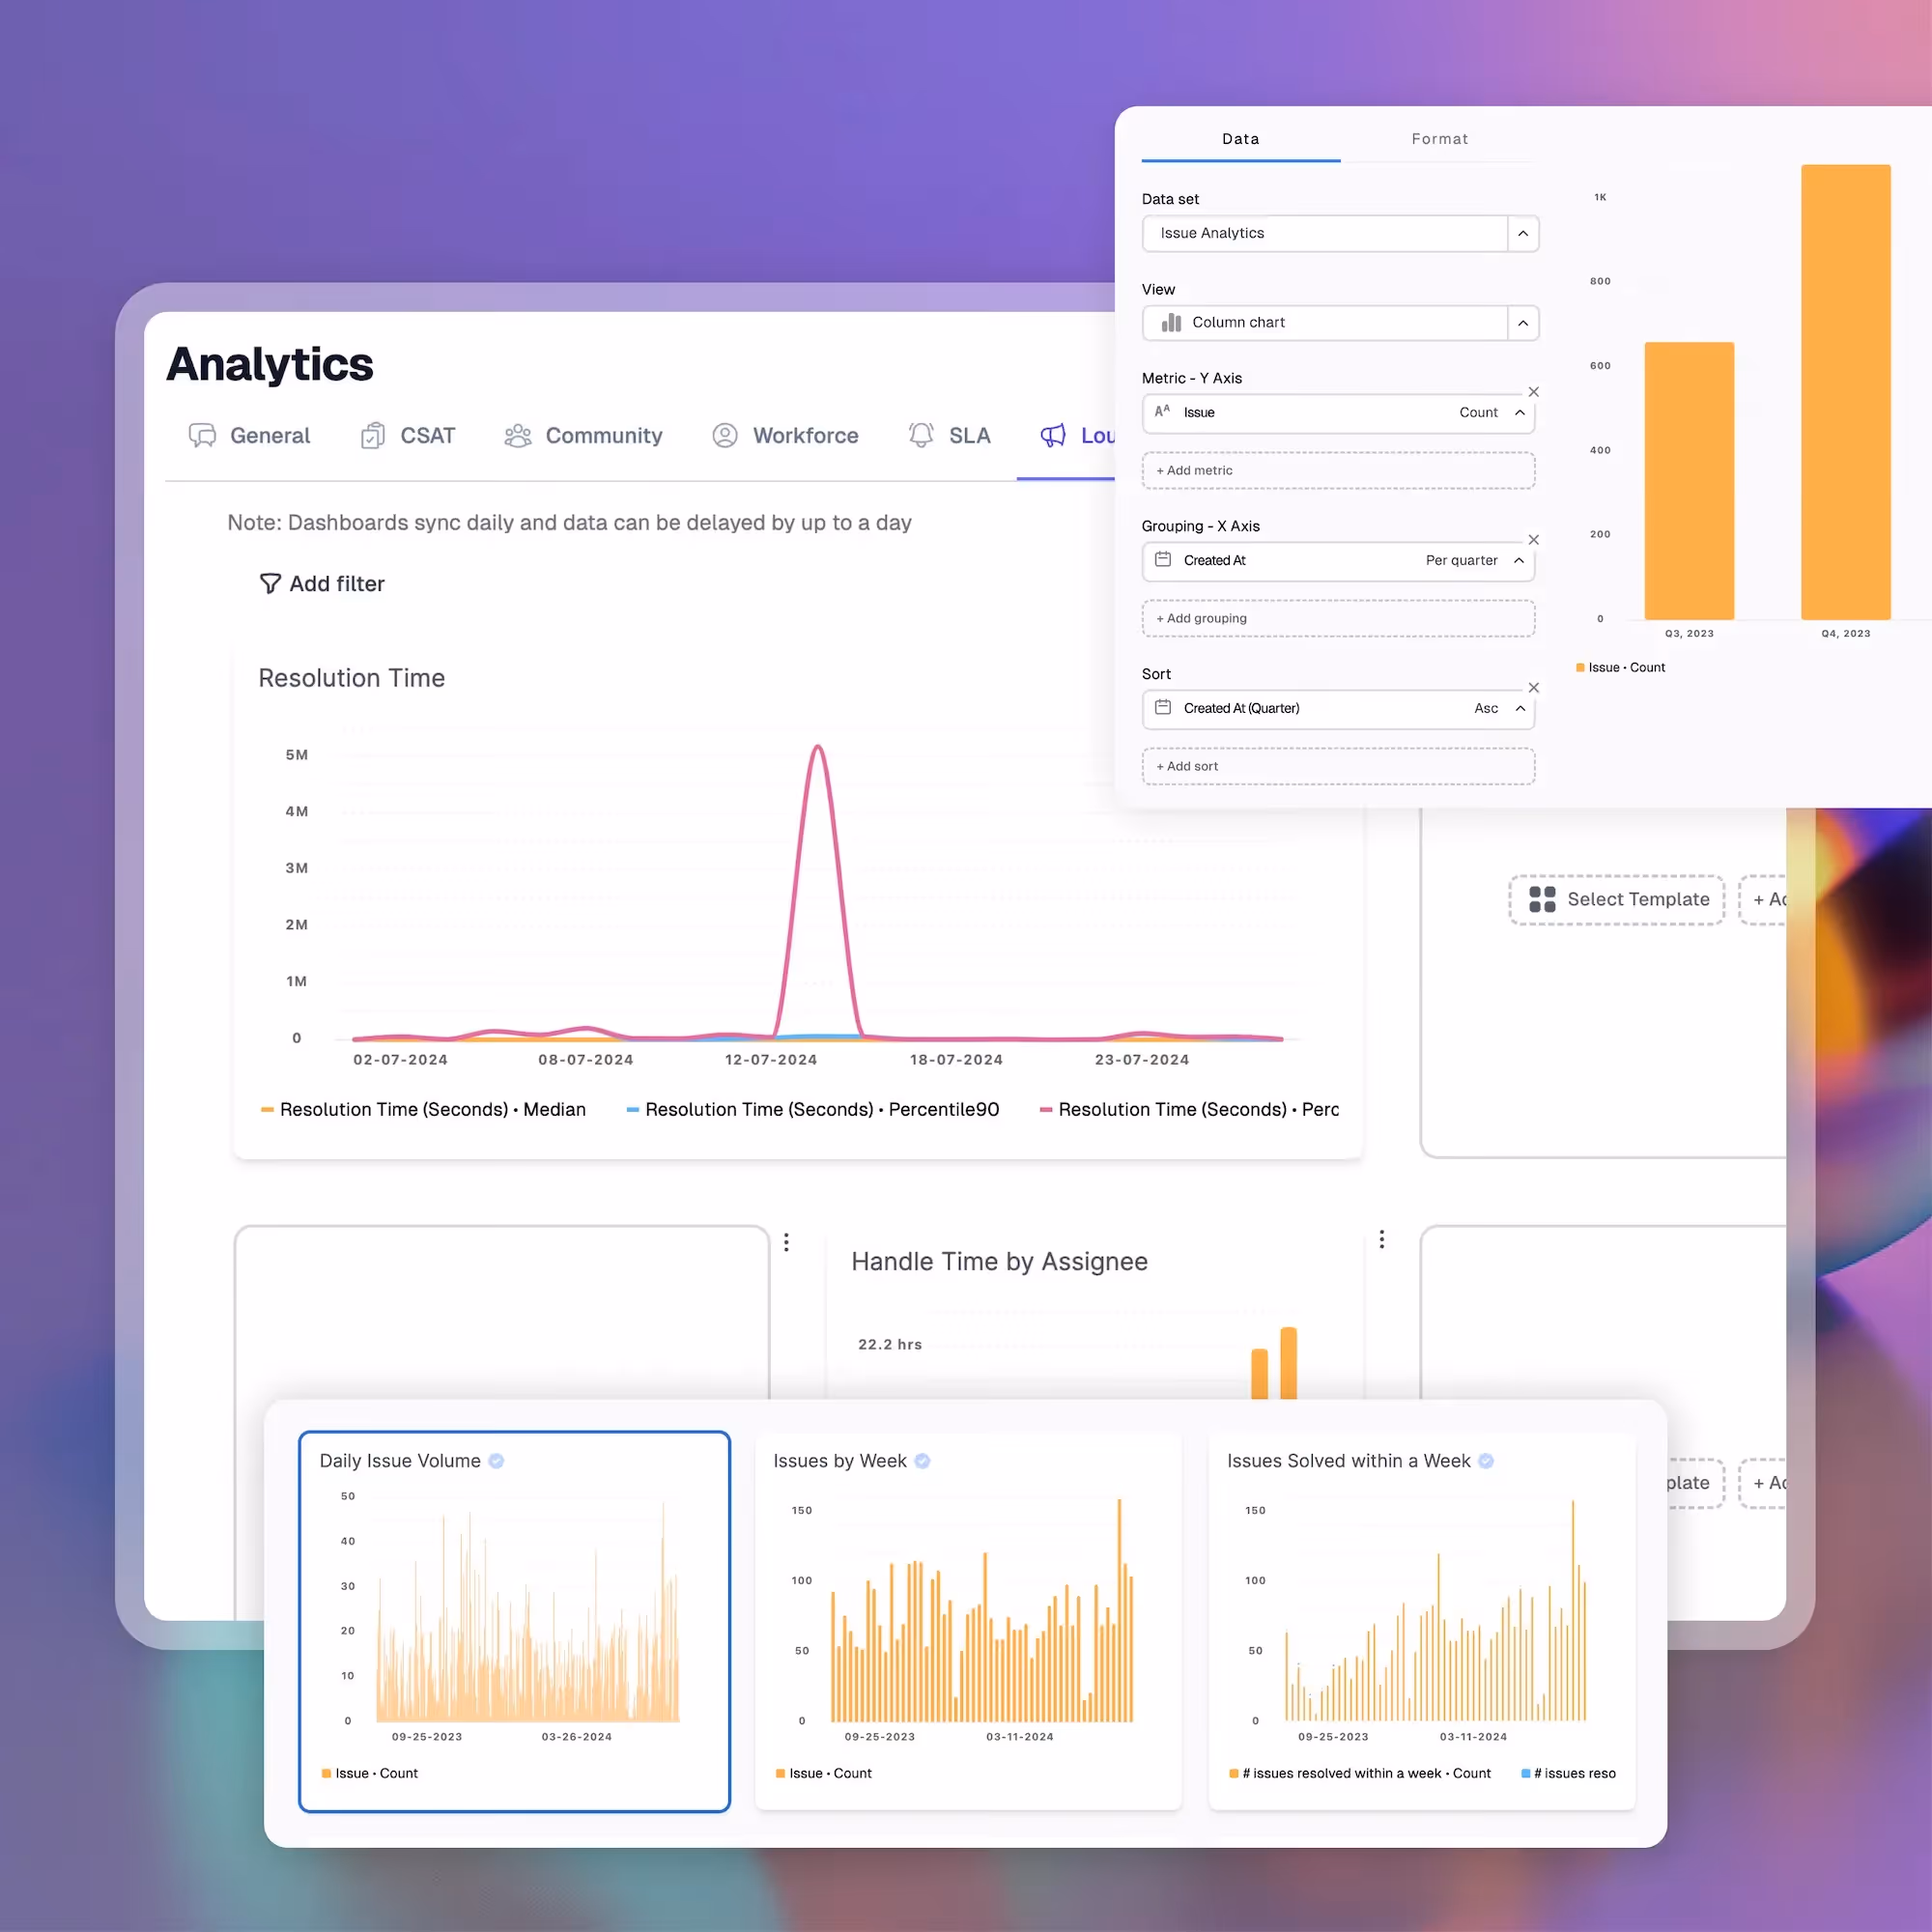
- Analytics & reporting. Track response times, tag volume, and resolution rates. Use built-in dashboards or connect to your BI tool.
- Platforms supported. Pylon supports Slack, Microsoft Teams, Discord, email, and in-app chat.
Biggest drawbacks:
- Newer player in the space, still evolving
- Designed only for B2B companies
- Custom pricing may require a sales call
Pricing:
- Custom pricing based on your team’s size and needs. Book a demo for full details.
Help Scout
Best for: Customer support teams and SMBs that want shared inbox + helpdesk tools in one platform.
Help Scout combines a shared inbox (which supports Gmail and Outlook) with helpdesk features like knowledge bases, chat widgets, and customer profiles. It’s clean, friendly, and easy to use.
Key features:
- Shared inbox
- Help center
- Live chat
- Customer profiles
- Reporting dashboards
Biggest drawbacks:
- Lacks complex automations
- Limited integrations
Pricing:
- Free for 50 contacts a month. Starts at $50 for 100 contacts per month for the Standard tier.
Front
Best for: Mid-to-large teams that handle customer communication across channels (email, SMS, social, etc.) and want everything in one collaborative inbox.
Front turns emails from Gmail and Outlook into a collaborative workspace where you can loop in teammates, comment internally, and manage multiple channels. It’s great for customer success and account management.
Key features:
- Multi-channel inbox
- Internal comments
- CRM integration
- Rules and automations
- Analytics
Biggest drawbacks:
- Higher learning curve
- Can get expensive at scale
Pricing:
- Starts at $19/user/month.
Hiver
Best for: Teams on Google Workspace that want a shared inbox inside Gmail. Ideal for small businesses that live in Gmail and need to manage group emails without switching to a separate help desk.
Hiver lives inside Gmail, so there’s no new platform to learn. You can assign emails, track status, and leave notes, all from your regular inbox.
Key features:
- Shared inbox in Gmail
- Notes and assignments
- SLA tracking
- Analytics
- Collision detection
Biggest drawbacks:
- Gmail only
- Limited integrations
Pricing:
- Free tier for basic usage.
- Starts at $19/user/month if you want a customer portal, workflow automations, and analytics.
Missive
Best for: Small teams and startups that want shared inbox + chat. Missive is a good solution if your team’s workflow involves a lot of back and forth on emails and you prefer a single app to both manage inboxes and have internal team chat.
Missive blends shared email (Gmail, Outlook) with real-time chat. You can discuss emails with your team in-thread before replying. It’s ideal for startups or lean teams.
Key features:
- Shared inbox
- Team chat
- Internal notes
- Task assignments
- Snooze & reminders
Biggest drawbacks:
- Not ideal for large teams
- Lacks deep analytics
Pricing:
- Free to try.
- Paid plans start at $14/user/month.
HubSpot Service Hub
Best for: Teams already using HubSpot CRM who want basic shared inbox functionality integrated with sales and marketing data. Also suitable for customer success teams that need a simple shared inbox plus CRM, but not a full-blown help desk system.
If you live in HubSpot, Service Hub adds a shared inbox (Gmail and Outlook), knowledge base, and ticketing features. It’s a solid upgrade from Gmail for smaller support teams.
Key features:
- Shared inbox
- Ticketing system
- CRM integration
- Knowledge base
- Automation workflows
Biggest drawbacks:
- Fewer features than standalone tools
- Requires HubSpot buy-in
Pricing:
- Starts at $90/month.
Zoho TeamInbox
Best for: Small businesses and teams that use Zoho apps or need an affordable, straightforward shared inbox. Great for those already in the Zoho ecosystem or any team looking for core shared inbox features on a tight budget.
Zoho TeamInbox is part of the Zoho suite. It’s a straightforward shared inbox with essentials like assignments, notes, and tagging, and support Zoho Mail, Gmail, and Outlook.
Key features:
- Shared inbox
- Tagging
- Thread assignment
- Collaboration
- Email templates
Biggest drawbacks:
- Dated UI
- Limited automation
Pricing:
- Starts at $5/user/month.
Freshdesk
Best for: Support teams that want a full-fledged helpdesk solution with ticketing, automation, knowledge base, etc., where a shared inbox is part of the system. Ideal for companies that may outgrow a simple shared inbox and need multichannel support in the future.
Freshdesk is a robust ticketing system with email at its core. You get a shared inbox for Gmail and Outlook plus tools for automation, a knowledge base, and chat.
Key features:
- Shared inbox
- Ticketing
- SLAs
- Chat and bots
- Analytics
Biggest drawbacks:
- Complex setup
- Can be overwhelming for small teams
Pricing:
- Free for basic use.
- Paid plans start at $15/agent/month.
Zendesk
Best for: Large orgs or fast-growing companies that need a scalable, enterprise-grade support platform. Ideal for high-volume support teams that require robust workflows, multi-channel support, and advanced customization.
Zendesk turns your Gmail and Outlook inboxes into a full-fledged support platform. It’s powerful, but it comes with a learning curve, and many more AI-focused alternatives are popping up that offer better features.
Key features:
- Multi-channel support
- Ticketing
- Workflow automation
- Help center
- AI bots
Biggest drawbacks:
- Expensive
- Steep learning curve
Pricing:
- Starts at $19/agent/month.
Shared Inbox Tool Comparison Table
Making an informed decision about shared inbox software is important, but hard to do if you’re not looking at key details head-to-head. Here’s a snapshot of the top tools to help you compare at a glance.
How to Choose the Right Shared Inbox Software
Shared inbox software can make a huge difference for your business and your customers. However, there’s no one-size-fits-all solution out there. One team email management tool might be fine for your business, but may lack important features and capabilities that another company needs.
They’re not created equal, either, so you’ll need to consider things pretty carefully before deciding on a group email management tool. We’ll walk through some of the considerations you’ll need to make when choosing shared inbox software.
Clarify your team’s size and use case
If you’ve got a three-person support team, your needs are different from a 30-agent customer success org. Think about email volume, complexity of requests, and how quickly you need to scale.
And don’t limit yourself to your team’s current size. Business needs change. Your team may grow over time. So, consider scalability and the likelihood that you’ll need to add users, which will affect pricing.
Pylon scales with your team. Whether you’re handling 10 tickets a day or 1,000, it grows with you.
Decide on key collaboration features needed
Organization is just one reason to invest in shared inbox software. Collaboration is another. The right platform will give your team the ability to work together to deliver faster results for customers/clients, as well as a more seamless, positive experience.
Of course, doing that requires the right collaboration capabilities. Look for tools with internal comments, @mentions, and collision detection. These features keep your team aligned and prevent miscommunication.
Look at automation and routing capabilities
A key part of customer service is speed of communication, while also getting customer messages in front of the right team member. Manually doing that is time-consuming and error-prone. Thankfully, shared inbox tools offer a better solution.
Smart routing and automation save time. Tools like Pylon let you create rules that move messages to the right person at the right time, alleviating bottlenecks and reducing the time required for customers to get the response they need.
Whether you want to route VIPs to a dedicated rep or trigger follow-ups on untouched threads, automation matters.
Check for integration with your existing tools
Your team already juggles a ton of other apps and platforms every day. Don’t pick a tool that requires your team to change everything. Your shared inbox should connect with your CRM, helpdesk, calendar, and chat tools.
Not only does that help prevent fragmentation, but it means it’s easier to connect the dots and deliver a better customer experience, while also making things easier on your people.
Pylon integrates with Salesforce, HubSpot, Slack, and more.
Evaluate the reporting and analytics monitoring tools
How will you measure the success (or lack thereof) of your customer service team? You need access to data so you can see what’s working and what’s not. This is not something you can “set and forget”. It requires an intentional strategy and regular monitoring.
Look for tools that show you response times, resolution rates, tag trends, and more. You can then use those metrics to help judge whether your efforts are successful and where you need to make adjustments.
Explore scalability and pricing
We talked about scalability previously, but it bears greater scrutiny. The right team email management tool will make it easy to add or remove users as necessary. That might be because your business is growing, or you could be in a seasonal industry, and team increases/decreases are regular things each year.
Make sure the tool you choose won’t lock you in with surprise costs. Understand what’s included in each pricing tier. You should also make sure that you can move from one tier to another as needed without penalties, particularly if you’re dealing with seasonal staffing trends.
Check on the quality of support and onboarding
Your team members already lose a ton of time each day due to unproductive tasks, app switching, and the like. Learning the ropes with your new shared inbox software should not add to that load.
Look for a vendor that offers hands-on support and clear documentation. The setup process should help (not hinder) you.
Pylon’s onboarding includes training, documentation, and expert support.
Tips for Implementing a Shared Inbox Successfully
Choosing the right shared inbox software is just the first step. You also need to implement it within your business, introduce it to your team members, and make it part of your tech toolbox. The following tips will help you do that more easily.
- Set clear ownership rules. Decide who handles which messages, and when. Avoid the "I thought someone else had it" trap. Not only does this help you reduce confusion, but it will speed up the communication and collaboration processes.
- Train your team. Walk through the new tool together. Show everyone how to assign, reply, tag, and leave notes. And don’t forget about retraining periodically and making this training part of the onboarding process for new hires.
- Configure workflows and tags early. Don’t wait. Start with a simple tagging system and evolve it as you learn. Implementing this at the beginning helps make sure that you have a system that works and that your people are familiar with it, while also giving you time to adjust it as you go.
- Communicate guidelines. Outline how to respond to different types of emails, when to escalate, and what tone to use. Don’t leave these to chance. Defining these guidelines from the beginning makes sure that everyone’s onboard with them from day one and helps you avoid miscommunication, failure to escalate, and other issues.
- Tap into the power of internal notes and @mentions. Encourage your team to leave notes instead of pinging each other in Slack. Keep context in one place for better organization, faster access to information, and greater relevance.
- Monitor and adjust. Review inbox traffic weekly. Look for patterns, gaps, or delays. Use that information to fine-tune your efforts, create new workflows, implement new rules and guidelines, and more.
- Regularly review analytics. Use your reporting tools to understand what’s working and what isn’t. If it’s not working, find out why and change it, then continue reviewing to make sure that the fix had the intended effect.
- Iterate on processes. Your shared inbox should evolve as your team does. Set a cadence for reviewing workflows. Understand that some workflows will evolve over time, while others may need to be eliminated, and new ones will need to be adopted (including training for the people using them).
Explore more
What is a Shared Inbox? Compare Shared Inbox Software Tools

How to Integrate Slack with Email to Improve Team Responsiveness


Explore more
How to scale your customer support team without adding headcount


How to use customer service satisfaction gap analysis to improve support

AI Help Desks: Providing Efficient, 24/7 Customer Support
Building a scalable help center with strategic knowledge base templates
